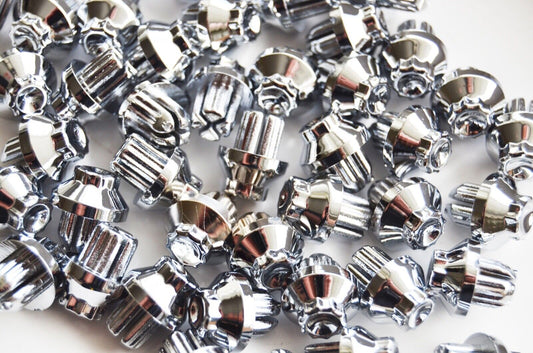
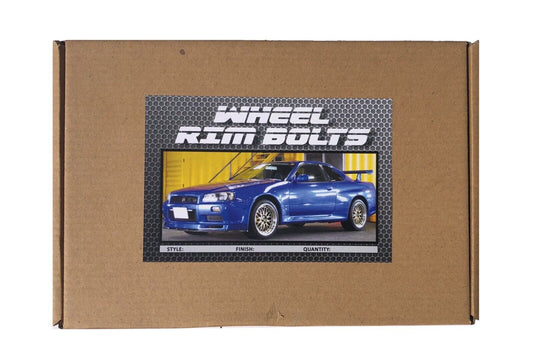
Collection: Wheel Rim Nuts for fake Split Rims
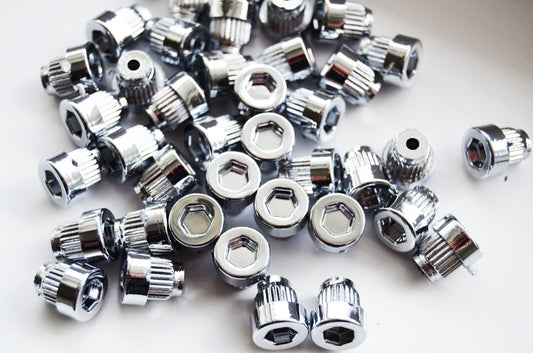
Quality Wheel nuts for fake split rims in Chrome, Black or Gold. Available in many sizes and finishes. We supply many trade wheel companies and have great feedback.
We do have an ebay shop - but can offer 10% off from our site over £15 orders as we don't have the ebay fees to pay.
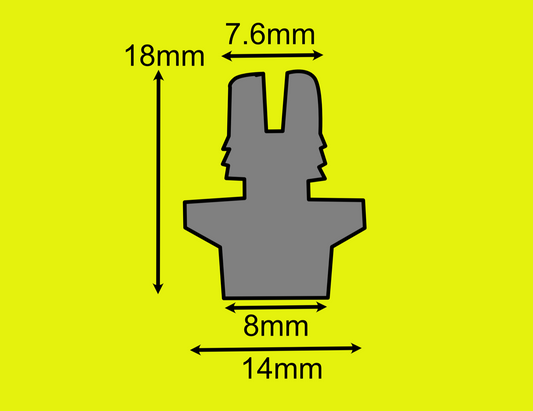
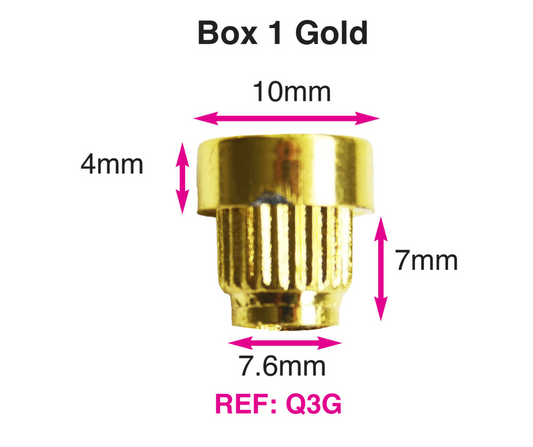
Please measure your existing nuts to get the correct size. Watch the video for the 3 measurements that you need. Verniers are available online very cheaply. If you are unsure, please drop us a message and we can help you.
You can remove your existing nuts with pliers, or if the holes goes completely through the wheel, use a drift or screwdriver to gently tap out with a rubber mallet. Use a rubber mallet and a piece of wood to refit. If you have had your wheels powder coated, you might need to use a drill bit by hand to gently remove the powder coat.
Do not user powerful aggressive wheel cleaners on the nuts without testing on a spare first as this may tarnish the finish.
We can ship throughout the UK and Europe and Australia.

INSTRUCTIONS
Replacing plastic rivets (fake bolts) on a simulated split rim wheel is a straightforward DIY project that involves extracting the old plastic studs, cleaning the mounting holes, and pressing new ones into place. [
Required Tools
* Replacement Rivets: Purchase a matching set of aftermarket rivets (available in chrome, gold, or black).
* Extraction Tools: Pliers, a flathead screwdriver, or a drill with a 6mm metal drill bit.
* Installation Tools: A soft wooden dowel, a screwdriver with a rubber/plastic handle base, and a rubber mallet.
* Adhesive (Optional): Standard superglue or silicone adhesive.
*
Step 1: Remove the Old Rivets
Fake split rim rivets are typically pressed or glued into blind holes on the wheel face.
* The Plier Method: Grip the exposed head of the rivet firmly with a pair of pliers. Twist back and forth while pulling outward to snap the adhesive bond and pull the stud out.
* The Drilling Method: If the rivets are old and brittle, the heads will likely snap off, leaving the plastic shaft stuck inside the wheel hole. Use a drill bit slightly smaller than the hole diameter (typically a 6mm or 1/4-inch bit) to carefully drill out the remaining plastic.
Step 2: Clean the Holes
* Clear out all plastic debris, shavings, and old glue from the empty holes.
* Wipe the area down with rubbing alcohol to ensure a clean surface for the new installation. [1]
Step 3: Install the New Rivets
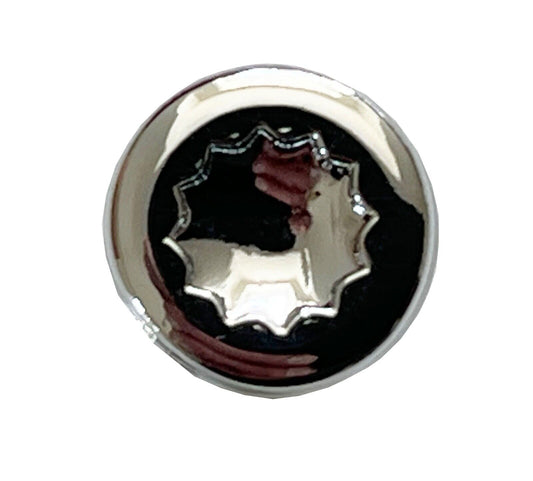
Replacement rivets feature small splines or ribs on the shaft to lock them into the wheel.
* Add Adhesive (Optional): If the original holes have become slightly enlarged or stripped, add a single drop of superglue or clear silicone into the hole or onto the rivet shaft before inserting it.
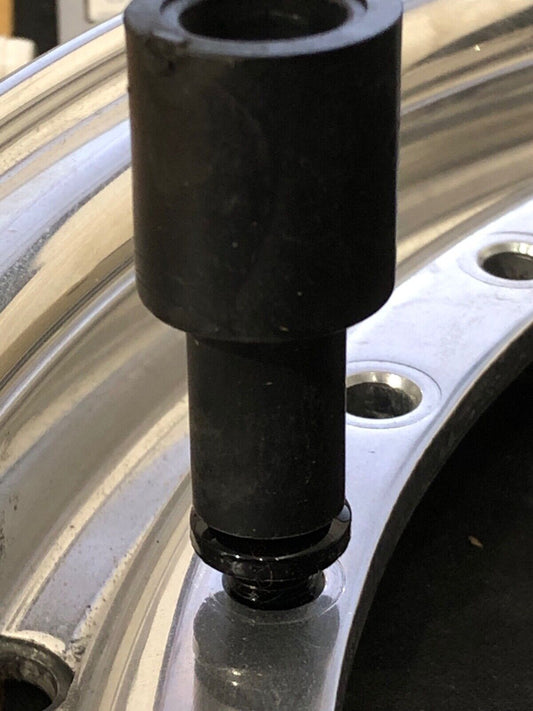
* Seat the Rivet: Align the new rivet straight over the hole and push it down by hand until the splines catch and it stands upright on its own.
* Drive it Flush: To avoid scratching or denting the new plastic rivet, do not strike it directly with a metal hammer. Place a wooden dowel, a thick plastic marker, or the rubber-capped base of a screwdriver handle directly over the rivet head. Strike the top of that tool firmly with a rubber mallet or hammer to drive the rivet perfectly flush with the wheel lip.
-
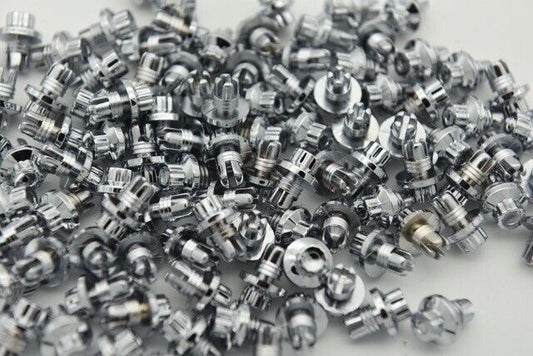
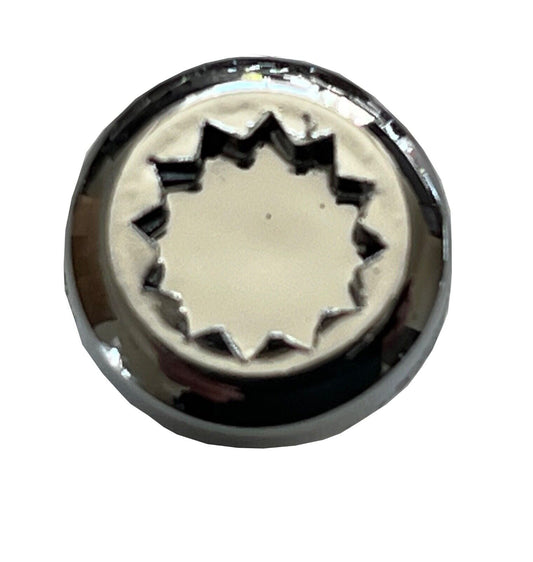
1 Sample x Chrome Plastic Wheels Rivet Nuts fake rim bolts Ref Q8C Box 7
Regular price £1.99Regular priceUnit price per -
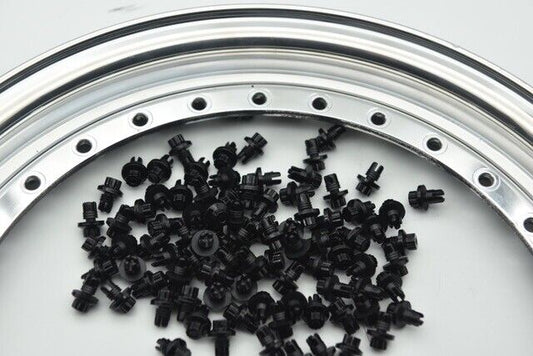
1 Sample x Black Plastic Wheels Rivet Nuts Replacement fake rim bolt
Regular price £1.99Regular priceUnit price per -
1 Sample x Chrome Plastic Wheels Rivet Nuts Replacement fake rim bolt
Regular price £2.99Regular priceUnit price per -
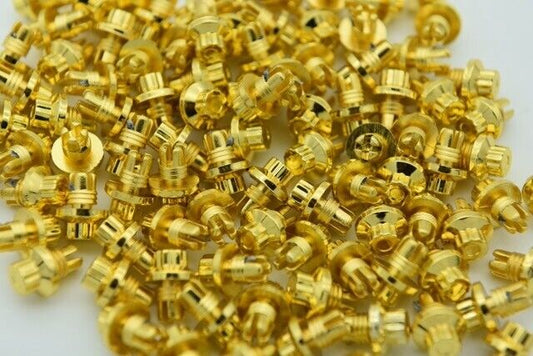
1 Sample x Gold Plastic Wheels Rivet Bolts Replacement fake rim bolt
Regular price £1.99Regular priceUnit price per -
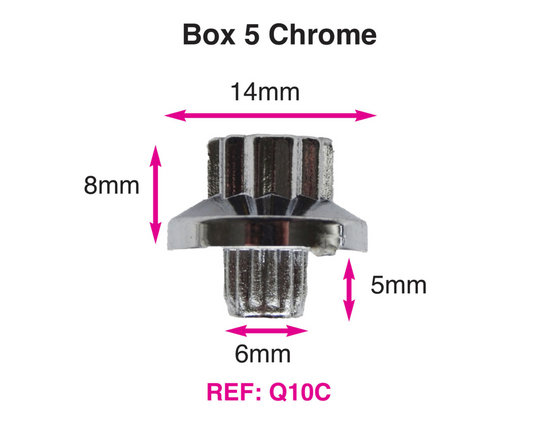
1 x sample Chrome Plastic Wheels Rivet Nuts fake rim bolts Ref Q10C Box 5
Regular price £1.99Regular priceUnit price per -
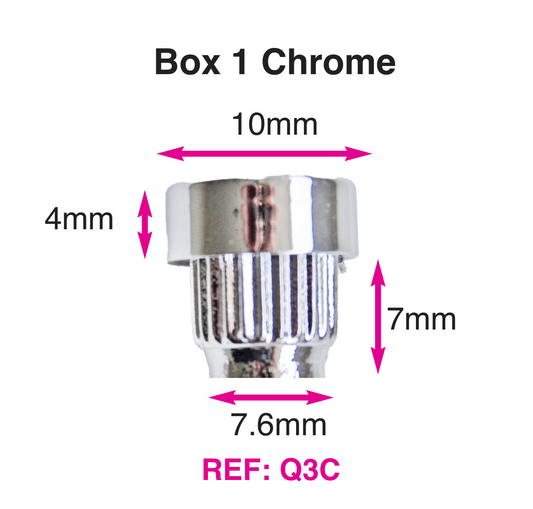
1 x Sample Chrome Plastic Wheels Rivet Nuts fake rim bolts Ref Q3C Box 1
Regular price £1.99Regular priceUnit price per -
1 x Sample Chrome Plastic Wheels Rivet Nuts fake rim bolts Ref Q6C Box 2
Regular price £1.99Regular priceUnit price per -
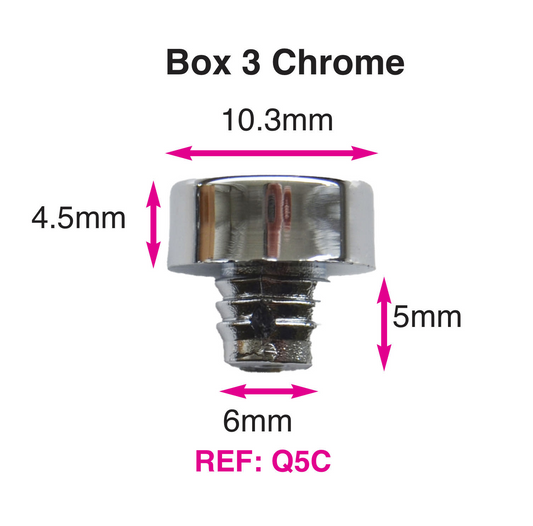
1 x Sample x Chrome Plastic Wheels Rivet Nuts fake rim bolts Ref Q5C Box 3
Regular price £1.99Regular priceUnit price per -
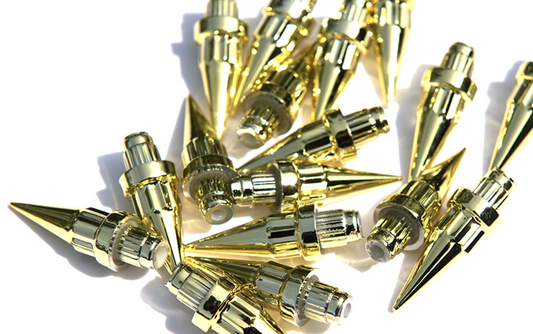
100 x 24k Gold Plastic Wheels Spike Rivet Nuts fake rim bolts Ref QSR Box 6
Regular price £39.99Regular priceUnit price per -
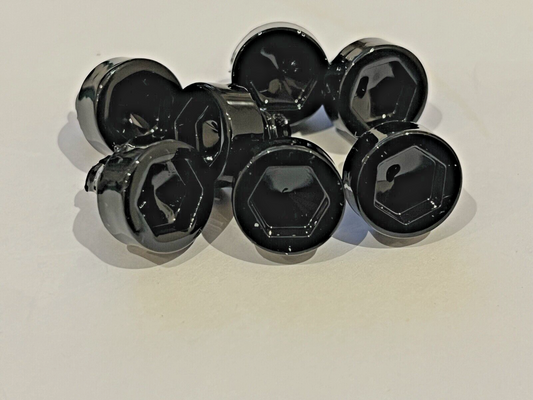
100 x Black Plastic Wheels Rivet Nuts fake rim bolts Ref ZSD Box 8
Regular price £27.99Regular priceUnit price per -
100 x Chrome Plastic Wheels Rivet Nuts for fake rim bolts + FREE TOOL
Regular price £21.49Regular priceUnit price per -
100 x Chrome Plastic Fake Split Rims Wheels Rivet Nuts fake rim bolts Ref Q5C Box 3
Regular price £27.99Regular priceUnit price per -
100 x Chrome Plastic Fake Split Rims Wheels Rivet Nuts fake rim bolts Ref Q11C Box 11
Regular price £27.99Regular priceUnit price per -
100 x Chrome Plastic Wheels Rivet Nuts fake rim bolts Ref Q10C Box 5
Regular price £27.99Regular priceUnit price per -
100 x Chrome Plastic Wheels Rivet Nuts fake rim bolts Ref Q2C Box 4
Regular price £27.99Regular priceUnit price per -
100 x Chrome Plastic Wheels Rivet Nuts fake rim bolts Ref Q6C Box 2
Regular price £27.99Regular priceUnit price per -
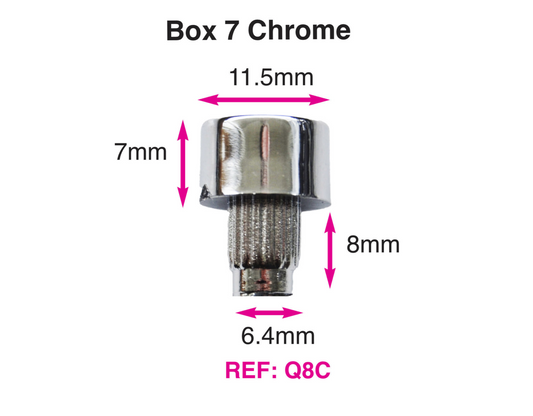
100 x Chrome Plastic Wheels Rivet Nuts fake rim bolts Ref Q8C Box 7
Regular price £27.99Regular priceUnit price per -
100 x Chrome Plastic Wheels Rivet Nuts fake rim bolts Ref Q13C Box 10
Regular price £27.99Regular priceUnit price per -
100 x Gloss Black Fake Split Rims Plastic Wheels Rivet Nuts fake rim bolts + FREE INSERTION TOOL
Regular price £21.49Regular priceUnit price per -
100 x Gold Plastic Rim Edge Fake Split Rims Wheel Rivets Nuts Replacement studs + FREE TOOL
Regular price £21.49Regular priceUnit price per -
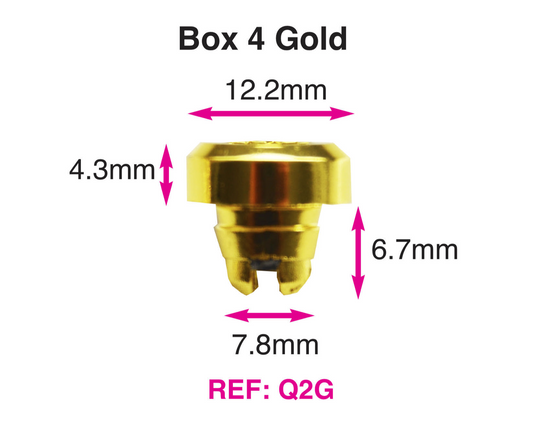
100 x Gold Plastic Wheels Rivet Nuts fake rim bolts Ref Q2G Box 4
Regular price £27.99Regular priceUnit price per -
100 x Gold Plastic Wheels Rivet Nuts fake rim bolts Ref Q3G Box 1
Regular price £27.99Regular priceUnit price per -
100 x Hex Head Chrome Plastic Wheels Rivet Nuts fake rim bolts Ref Q3C Box 1
Regular price £27.99Regular priceUnit price per -
120 x 24k Gold Plastic Wheels Spike Rivet Nuts fake rim bolts Ref QSR Box 6
Regular price £44.99Regular priceUnit price per